Views: 36
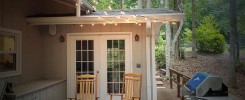
One of the best features of our house (especially when we have NICE weather), is our Deck and the Outdoor Speakers we just installed. While there are miles and miles it seems to maintain all of the deck (1400+ Square Feet), we do enjoy being outside on cool evenings. Today I will give you some of our thoughts on why we replaced our old outdoor speakers just outside our kitchen with new waterproof outdoor speakers.
Outdoor Speakers
I have always wanted outdoor speakers on a deck. After spending some time at a friends house (I think he had Klipsch outdoor speakers and a sub woofer in the ground) I knew it was something we would want to do. I won’t go so far to do a sub but we did want to get a decent quality pair of speakers. I talked to my brother, the forever audiophile and consultant for many things that I do.
He suggested to go over to MonoPrice. They always have great deals and carry top rated outdoor speakers. Since they will be outside anyway we don’t know how they would weather the storms so why spend a large amount of cash on them. We also discussed outdoor speakers wired vs. wireless outdoor speakers.
Wireless speakers require you to still have a wire. aka power to them. Since we already had the speaker cable, we just opted to replace the speakers that were missing with new units.
With that, I was able to find a really good deal on a pair of 6.5″ top rated outdoor speakers at a great price. I liked this blurb from their website.
Sound Quality: Life is too short for speakers that don’t sound great! We believe that the whole point of listening to music is to hear it as the artist intended. Our engineers and audio experts have spent countless hours listening to and comparing various speakers until we were satisfied we had found models that fit our demanding standards.
Style: While Monoprice believes in function over form, there is nothing wrong with having speakers that look good, too.
Installing Outdoor Speakers
Installing them was a breeze due to the fact that previous owners left the wiring in the walls and the mounting brackets. However, here are a couple of tips regardless if you are installing completely new or have existing locations. If you are doing a new construction build (PLEASE) keep in mind what you might want to do down the road. Even if you run the wire, and create a junction box outside today it could save you hundreds of dollars later. Then it will cost you only your time to mount the speakers and connecting the wires.
Tools you will need
Carpenter’s level
Marking pen or pencil
Electric drill
Drill bits
14AWG CL2 in-wall rated speaker wire (SKU 2821)
Wire strippers
I also grabbed new speaker wire, a blank wall outlet plate and stainless screws to mount the speakers
Removal of the old equipment
Installation Steps
Now mark the location and mount the speaker bracket. MonoPrice included EVERYTHING I needed however, I wanted to mount it with some stainless screws due to the amount of moisture we have. I would recommend getting high quality screws, as you don’t want rust running down your wall staining your outer surface.
Wire up the speakers
Slide the wire through the hole and hot glue the backside to seal moisture out. Finally, crimp the wires notating positive and negative leads. The old wires in the wall worked fine even if they were not my choice of style they worked perfectly!
Finally connect to the back of the speaker.
2nd Speaker Mounting
Crank up the music
This side by side shot shows you how well these turned out. We are really excited every time we get a chance to turn on the receiver and listen to music out there! It’s so simple to use my phone app for our Pioneer Elite receiver. It allows me to control what music source I can use and even control the volume all from one location.


I hope this post inspire others to do more for your outdoor living spaces. Using these top rated outdoor speakers from Monoprice to play music seems like being in a Music Hall listening to a Symphony. If you want to jam out to Rock, R&B or whatever your choice, these will play that too – but maybe not be neighbor friendly :).
Have you added speakers to an outdoor space at your house? We would love to hear your story!
Leave a comment below!
In our next post, I will talk about the overhead deck lighting (come back to see that post).
Until next time!


